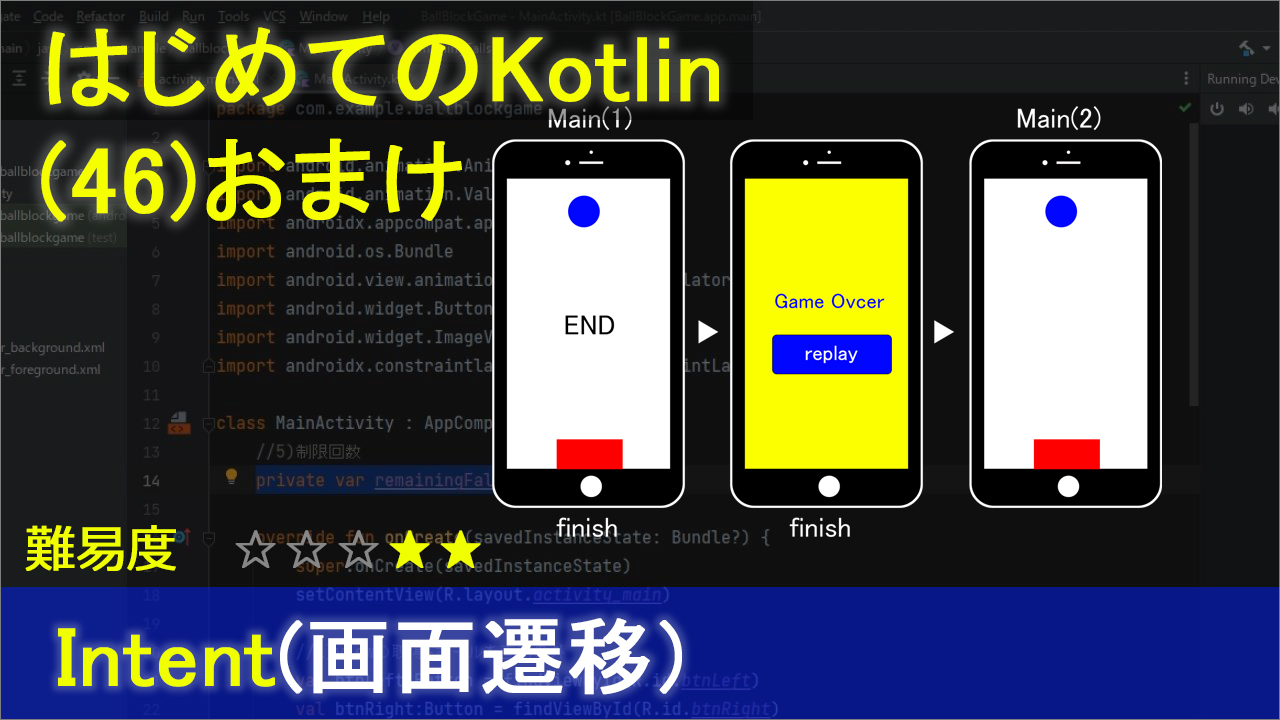
前回作った簡単なボールとブロックの落ちゲーアプリで、今回はintentという呪文を使って
別の画面を表示させるやり方について解説します。
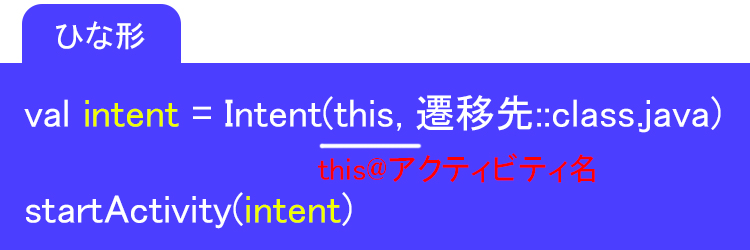
Intentの書き方

val intent = Intent(this,遷移先::class.java)
startActivity(intent)
None of the following functions can be called with the arguments supplied
「提供された引数では次の関数のいずれも呼び出せません」
と表示された場合は「this@アクティビティ名」と書きます
val intent = Intent(this@アクティビティ名,遷移先::class.java)
startActivity(intent)
動画
コード
▼activity_main.xml
<?xml version="1.0" encoding="utf-8"?>
<androidx.constraintlayout.widget.ConstraintLayout xmlns:android="http://schemas.android.com/apk/res/android"
    xmlns:app="http://schemas.android.com/apk/res-auto"
    xmlns:tools="http://schemas.android.com/tools"
    android:layout_width="match_parent"
    android:layout_height="match_parent"
    tools:context=".MainActivity">

    <Button
        android:id="@+id/btnLeft"
        android:layout_width="wrap_content"
        android:layout_height="wrap_content"
        android:layout_marginBottom="8dp"
        android:text="Left"
        app:layout_constraintBottom_toBottomOf="parent"
        app:layout_constraintEnd_toStartOf="@+id/btnStart"
        app:layout_constraintHorizontal_bias="0.5"
        app:layout_constraintStart_toStartOf="parent" />

    <Button
        android:id="@+id/btnRight"
        android:layout_width="wrap_content"
        android:layout_height="wrap_content"
        android:layout_marginBottom="8dp"
        android:text="Right"
        app:layout_constraintBottom_toBottomOf="parent"
        app:layout_constraintEnd_toEndOf="parent"
        app:layout_constraintHorizontal_bias="0.5"
        app:layout_constraintStart_toEndOf="@+id/btnStart" />

    <Button
        android:id="@+id/btnStart"
        android:layout_width="wrap_content"
        android:layout_height="wrap_content"
        android:layout_marginBottom="8dp"
        android:text="Start"
        app:layout_constraintBottom_toBottomOf="parent"
        app:layout_constraintEnd_toStartOf="@+id/btnRight"
        app:layout_constraintHorizontal_bias="0.5"
        app:layout_constraintStart_toEndOf="@+id/btnLeft" />

    <androidx.constraintlayout.widget.ConstraintLayout
        android:layout_width="match_parent"
        android:layout_height="0dp"
        android:layout_marginBottom="8dp"
        app:layout_constraintBottom_toTopOf="@+id/btnStart"
        app:layout_constraintTop_toTopOf="parent"
        tools:layout_editor_absoluteX="1dp">

        <ImageView
            android:id="@+id/ivBall"
            android:layout_width="wrap_content"
            android:layout_height="wrap_content"
            app:layout_constraintStart_toStartOf="parent"
            app:layout_constraintTop_toTopOf="parent"
            app:srcCompat="@drawable/ball" />

        <ImageView
            android:id="@+id/ivBlock"
            android:layout_width="wrap_content"
            android:layout_height="wrap_content"
            app:layout_constraintBottom_toBottomOf="parent"
            app:layout_constraintEnd_toEndOf="parent"
            app:layout_constraintStart_toStartOf="parent"
            app:srcCompat="@drawable/block" />
    </androidx.constraintlayout.widget.ConstraintLayout>
</androidx.constraintlayout.widget.ConstraintLayout>
▼MainActivity.kt
package com.example.ballblockgame

import android.animation.Animator
import android.animation.ValueAnimator
import android.content.Intent
import androidx.appcompat.app.AppCompatActivity
import android.os.Bundle
import android.view.animation.AccelerateInterpolator
import android.widget.Button
import android.widget.ImageView
import androidx.constraintlayout.widget.ConstraintLayout

class MainActivity : AppCompatActivity() {
    //5)制限回数
    private var remainingFalls = 5

    override fun onCreate(savedInstanceState: Bundle?) {
        super.onCreate(savedInstanceState)
        setContentView(R.layout.activity_main)

        //1)viewの取得+ボールを画面の外
        val btnLeft:Button = findViewById(R.id.btnLeft)
        val btnRight:Button = findViewById(R.id.btnRight)
        val btnStart:Button = findViewById(R.id.btnStart)
        val ivBall :ImageView = findViewById(R.id.ivBall)
        val ivBlock :ImageView = findViewById(R.id.ivBlock)
        ivBall.translationY = -200f //起動直後は画面の外

        //2)左ボタンを押したら
        btnLeft.setOnClickListener {
            val params = ivBlock.layoutParams as ConstraintLayout.LayoutParams
            params.leftMargin -=50 //左の余白を減らす
            ivBlock.layoutParams = params
        }

        //3)右ボタンを押したら
        btnRight.setOnClickListener {
            val params = ivBlock.layoutParams as ConstraintLayout.LayoutParams
            params.rightMargin -= 50 //右の余白を減らす
            ivBlock.layoutParams = params
        }

        //8)スタートボタン
        btnStart.setOnClickListener {
            //4)アニメーション
            val screenHeight =resources.displayMetrics.heightPixels.toFloat() //画面の高さ
            val anim = fallingAnimator(ivBall,ivBlock,screenHeight)//中身は「5」へ
            anim.start()
            //btnStart.isEnabled = false
        }
    }

    //5)「4」の中身
    private fun fallingAnimator(ball:ImageView,block:ImageView,sHeight:Float):ValueAnimator{
        // [5-1]X軸(ヨコ幅)の、ランダムな初期位置を設定
        val screenWidth = resources.displayMetrics.widthPixels.toFloat()-ball.width //画面幅 -ボール幅
        ball.translationX = (Math.random() * screenWidth).toFloat()

        val animator = ValueAnimator.ofFloat(0f,sHeight)
        animator.duration = 3000 // アニメーションの時間(ミリ秒)
        animator.interpolator = AccelerateInterpolator() //アニメーションの加速度

        //[5-2]フレームの更新
        animator.addUpdateListener { valueAnimator ->
            val value = valueAnimator.animatedValue as Float
            ball.translationY = value

            //6)衝突検出 ⇒条件の中身は「7」へ
            if(isColliding(ball,block)){
                //衝突したらアニメーションをキャンセル
                animator.cancel()
                //ボールを枠の外に出す
                ball.translationY = -200f//画面の枠のもっと上
            }
        }
        //[5-3]アニメーションの開始、終了、キャンセル、または繰り返しのイベント
        animator.addListener(object :Animator.AnimatorListener{
            override fun onAnimationStart(animation: Animator) {}
            //[5-4]アニメーションが終わったら新しく生成(※回数に達したら終了)
            override fun onAnimationEnd(animation: Animator) {
                //制限回数を1減らす
                remainingFalls--
                //制限回数が残っている場合、新しいアニメーションを作成して再生
                if(remainingFalls>0){
                    //アニメーションが終わったら、新しいアニメーションを作成して再生
                    val newAnimator = fallingAnimator(ball, block, sHeight)
                    newAnimator.start()
                }else{
                    //9)制限回数が無くなったら終了画面へ
                    val intent = Intent(this@MainActivity,SecondActivity::class.java)
                    startActivity(intent)
                    finish()
                }
            }
            override fun onAnimationCancel(animation: Animator) {}
            override fun onAnimationRepeat(animation: Animator) {}
        })
        //[5-5]値を返す
        return animator
    }

    //7)衝突の条件
    private fun isColliding(ball:ImageView,block:ImageView):Boolean{
        val ballX = ball.x
        val ballY = ball.y
        val ballWidth = ball.width
        val ballHeight = ball.height

        val blockX = block.x
        val blockY = block.y
        val blockWidth = block.width
        //val blockHeight = block.height

        return ballX<blockX+blockWidth &&
                ballX + ballWidth>blockX &&
                ballY+ballHeight > blockY
        //ballY < blockY + blockHeight
    }
}
▼activity_second.xml
<?xml version="1.0" encoding="utf-8"?>
<androidx.constraintlayout.widget.ConstraintLayout xmlns:android="http://schemas.android.com/apk/res/android"
    xmlns:app="http://schemas.android.com/apk/res-auto"
    xmlns:tools="http://schemas.android.com/tools"
    android:layout_width="match_parent"
    android:layout_height="match_parent"
    android:background="#FFEB3B"
    tools:context=".SecondActivity">

    <TextView
        android:id="@+id/textView"
        android:layout_width="wrap_content"
        android:layout_height="wrap_content"
        android:text="Game Over"
        android:textSize="34sp"
        app:layout_constraintBottom_toBottomOf="parent"
        app:layout_constraintEnd_toEndOf="parent"
        app:layout_constraintStart_toStartOf="parent"
        app:layout_constraintTop_toTopOf="parent" />

    <Button
        android:id="@+id/btnReplay"
        android:layout_width="wrap_content"
        android:layout_height="wrap_content"
        android:text="Replay"
        app:layout_constraintBottom_toBottomOf="parent"
        app:layout_constraintEnd_toEndOf="parent"
        app:layout_constraintStart_toStartOf="parent"
        app:layout_constraintTop_toBottomOf="@+id/textView" />
</androidx.constraintlayout.widget.ConstraintLayout>
▼SecondActivity.kt
package com.example.ballblockgame

import android.content.Intent
import androidx.appcompat.app.AppCompatActivity
import android.os.Bundle
import android.widget.Button

class SecondActivity : AppCompatActivity() {
    override fun onCreate(savedInstanceState: Bundle?) {
        super.onCreate(savedInstanceState)
        setContentView(R.layout.activity_second)

        //10)リプレイボタンを押したら、メイン画面を呼び出す
        val btnReplay:Button = findViewById(R.id.btnReplay)
        btnReplay.setOnClickListener {
            val intent = Intent(this,MainActivity::class.java)
            startActivity(intent)
            finish()
        }
    }
}
Intentについて(9)制限回数が無くなったら終了画面へ)
ひとまずテンプレートを書いて行きますが。
val intent = Intent(this,SecondActivity::class.java)
これがテンプレートです
さて、これでOKかと思いきや、何やらIntentのところに、にょろにょろが出ています。なんでやと。
None of the following functions can be called with the arguments supplied
「提供された引数では次の関数のいずれも呼び出せません」
正解を言っておくと
this@MainActivity
と記述します。
そもそもこのthisっていうのは自分自身という意味なんですけど
厳密には「自身のクラス」という意味です。
てことで、今回の場合のthisは、このオブジェクトのクラスをさすので
画面全体を指定する場合には@(アットマーク)に続けて大枠の自身が所属するクラス、今回でいうと
MainActivityを書いてあげる必要がります。
ちなみに@っていれると、もう予測でMainActivityって出ますので、これを選択。
はい、これで赤いエラーが消えました。


