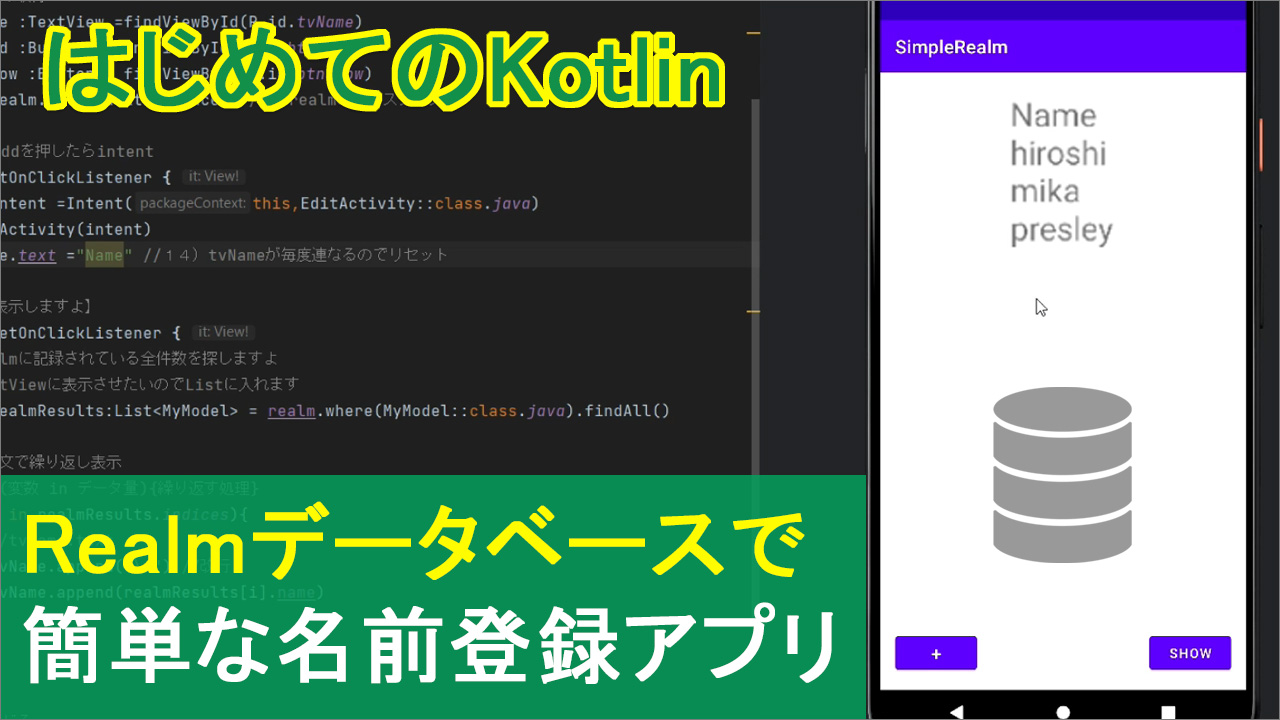
kotlinで、データベース「Realm」を使ったアプリ開発について解説したいと思います。
今回は、名前を入力したら「保存」される、そして「表示される」というシンプルな名簿アプリっぽいもの(お名前登録アプリ)を作ります。
で、次回はこれを踏まえて、「Realm×RecyclerView」で、名前と年齢を追加したり編集したり削除したり、というかなり本番さながらの名簿アプリを解説予定です。今回は、その予備知識的なアプリです。
Realm導入の記述(javaSDK公式)←※SDKはjavaSDKを使用
動画
目次
| タイトル | 再生時間 |
| データベースって何? | 05:00~ |
| Realmって何? | 10:10~ |
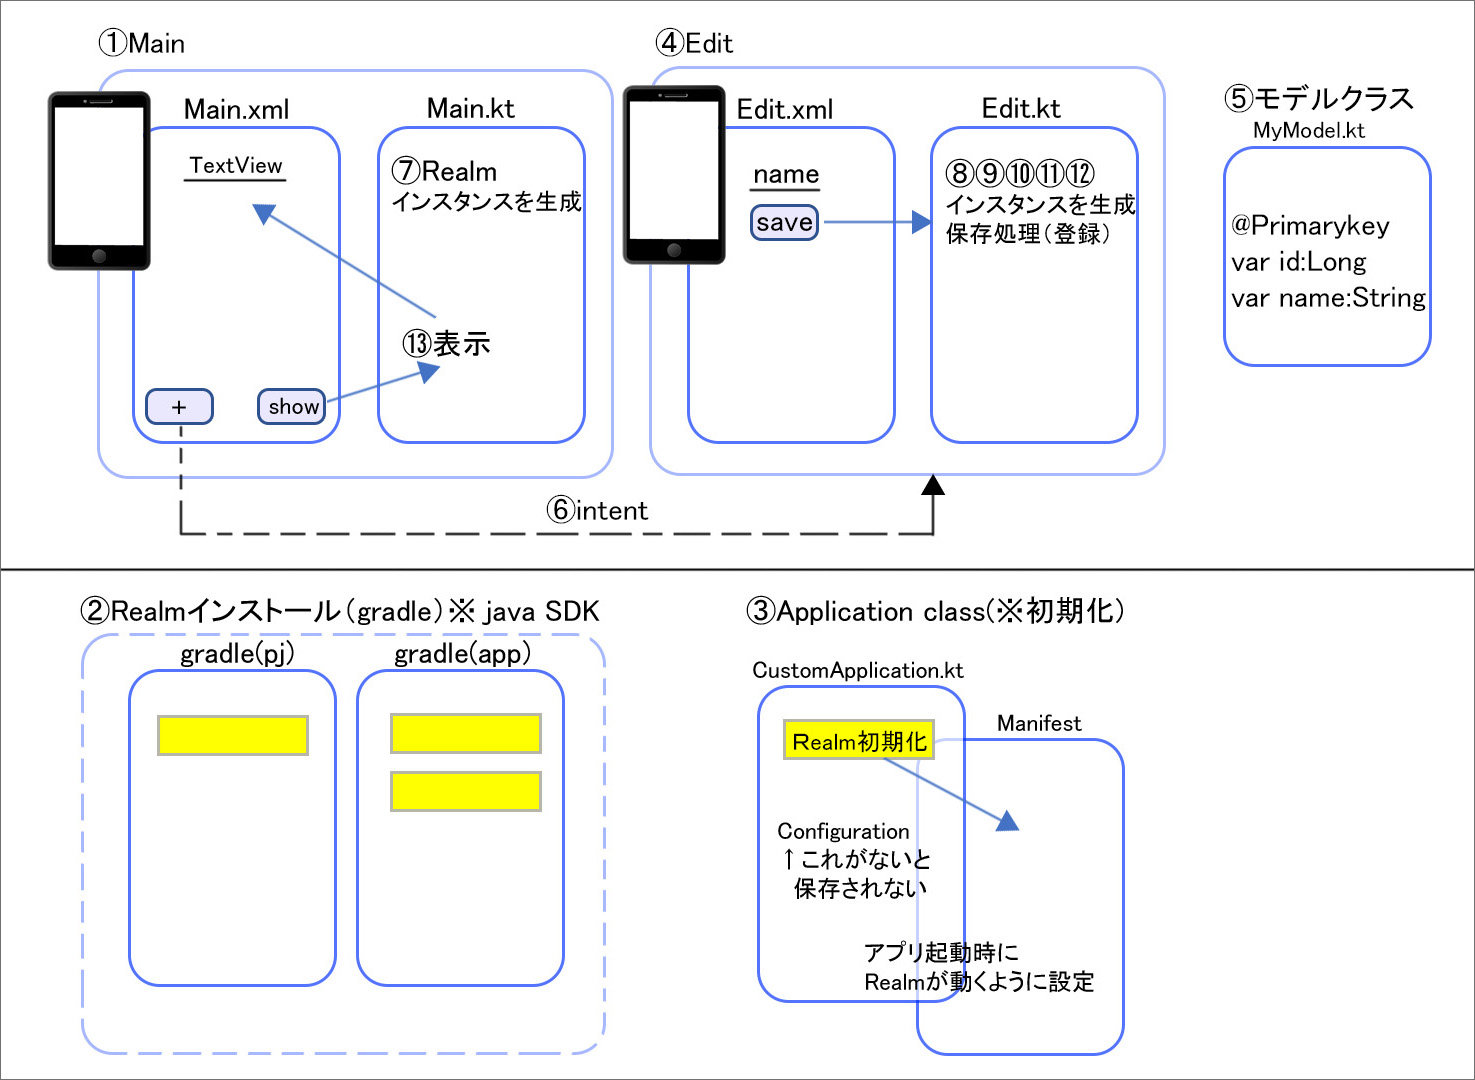
| [1]main.xmlと全体の流れ | 14:05~ |
| [2]gradleファイル(Realm導入) | 27:00~ |
| -なぜjavaSDKなのか | 28:55~ |
| [3]Application class(初期化) | 42:55~ |
| [4]EditActivity | 48:50~ |
| [5]モデルクラス | 54:00~ |
| [6]Intent | 56:30~ |
| [7]Realmインスタンス生成 | 58:40~ |
| [8-12]データに保存 | 1:01:20~ |
| [13]データの表示 | 1:14:50~ |
| [14]微調整して完成 | 1:23:15~ |
コード
▼activity.main.xml
<?xml version="1.0" encoding="utf-8"?>
<androidx.constraintlayout.widget.ConstraintLayout xmlns:android="http://schemas.android.com/apk/res/android"
    xmlns:app="http://schemas.android.com/apk/res-auto"
    xmlns:tools="http://schemas.android.com/tools"
    android:layout_width="match_parent"
    android:layout_height="match_parent"
    tools:context=".MainActivity">

    <TextView
        android:id="@+id/tvName"
        android:layout_width="wrap_content"
        android:layout_height="wrap_content"
        android:layout_marginTop="16dp"
        android:text="Name"
        android:textSize="20sp"
        app:layout_constraintEnd_toEndOf="parent"
        app:layout_constraintStart_toStartOf="parent"
        app:layout_constraintTop_toTopOf="parent" />

    <Button
        android:id="@+id/btnAdd"
        android:layout_width="wrap_content"
        android:layout_height="wrap_content"
        android:layout_marginStart="16dp"
        android:layout_marginBottom="16dp"
        android:text="+"
        android:textSize="20sp"
        app:layout_constraintBottom_toBottomOf="parent"
        app:layout_constraintStart_toStartOf="parent" />

    <Button
        android:id="@+id/btnShow"
        android:layout_width="wrap_content"
        android:layout_height="wrap_content"
        android:layout_marginEnd="16dp"
        android:layout_marginBottom="16dp"
        android:text="show"
        app:layout_constraintBottom_toBottomOf="parent"
        app:layout_constraintEnd_toEndOf="parent" />
</androidx.constraintlayout.widget.ConstraintLayout>
▼MainActivity.kt
package com.example.simplerealm

import android.content.Intent
import androidx.appcompat.app.AppCompatActivity
import android.os.Bundle
import android.widget.Button
import android.widget.TextView
import io.realm.Realm
import io.realm.kotlin.where

class MainActivity : AppCompatActivity() {
    private lateinit var realm :Realm//7)realmの変数を用意

    override fun onCreate(savedInstanceState: Bundle?) {
        super.onCreate(savedInstanceState)
        setContentView(R.layout.activity_main)
        //1)Viewの取得
        val tvName :TextView =findViewById(R.id.tvName)
        val btnAdd :Button = findViewById(R.id.btnAdd)
        val btnShow :Button = findViewById(R.id.btnShow)
        realm = Realm.getDefaultInstance()//7)realmのインスタンス

        //6)btnAddを押したらintent
        btnAdd.setOnClickListener {
            val intent =Intent(this,EditActivity::class.java)
            startActivity(intent)
            tvName.text ="Name" //14)tvNameが毎度連なるのでリセット
        }
        //13)【表示しますよ】
        btnShow.setOnClickListener {
            //realmに記録されている全件数を探しますよ
            //TextViewに表示させたいのでListに入れます
            val realmResults:List<MyModel> = realm.where(MyModel::class.java).findAll()

            //for文で繰り返し表示
            //for(変数 in データ量){繰り返す処理}
            for(i in realmResults.indices){
                //tvName.text
                tvName.append("\n") //改行
                tvName.append(realmResults[i].name) //文字を連結して表示
            }
        }
    }

    //7)Realmを閉じる
    override fun onDestroy() {
        super.onDestroy()
        realm.close()
    }
}
▼build.gradle(project)
// Top-level build file where you can add configuration options common to all sub-projects/modules.
//https://www.mongodb.com/docs/realm/sdk/java/install/

buildscript {
    repositories {
        mavenCentral()
    }
    dependencies {
        classpath "io.realm:realm-gradle-plugin:10.11.1"
    }
}

plugins {
    id 'com.android.application' version '7.3.1' apply false
    id 'com.android.library' version '7.3.1' apply false
    id 'org.jetbrains.kotlin.android' version '1.7.20' apply false
}
▼build.gradle(app)
plugins {
    id 'com.android.application'
    id 'org.jetbrains.kotlin.android'
    id 'org.jetbrains.kotlin.kapt'
}

apply plugin: "realm-android"

android {
    namespace 'com.example.simplerealm'
    compileSdk 33

    defaultConfig {
        applicationId "com.example.simplerealm"
        minSdk 21
        targetSdk 32
        versionCode 1
        versionName "1.0"

        testInstrumentationRunner "androidx.test.runner.AndroidJUnitRunner"
    }

    buildTypes {
        release {
            minifyEnabled false
            proguardFiles getDefaultProguardFile('proguard-android-optimize.txt'), 'proguard-rules.pro'
        }
    }
    compileOptions {
        sourceCompatibility JavaVersion.VERSION_1_8
        targetCompatibility JavaVersion.VERSION_1_8
    }
    kotlinOptions {
        jvmTarget = '1.8'
    }
}

dependencies {

    implementation 'androidx.core:core-ktx:1.9.0'
    implementation 'androidx.appcompat:appcompat:1.5.1'
    implementation 'com.google.android.material:material:1.7.0'
    implementation 'androidx.constraintlayout:constraintlayout:2.1.4'
    testImplementation 'junit:junit:4.13.2'
    androidTestImplementation 'androidx.test.ext:junit:1.1.5'
    androidTestImplementation 'androidx.test.espresso:espresso-core:3.5.1'
}
▼CustomApplication.kt
package com.example.simplerealm

import android.app.Application
import io.realm.Realm
import io.realm.RealmConfiguration

//3)初期化&構築
class CustomApplication :Application() {
    override fun onCreate() {
        super.onCreate()
        Realm.init(this)

        //Configuration 構築
        //これがないと、書き込む実行できない(アプリが強制終了される)
        val config =RealmConfiguration.Builder()
            .allowWritesOnUiThread(true)
            .allowQueriesOnUiThread(true)
            .build()
        Realm.setDefaultConfiguration(config)
    }
}
▼AdnroidManifest.xml
<?xml version="1.0" encoding="utf-8"?>
<manifest xmlns:android="http://schemas.android.com/apk/res/android"
    xmlns:tools="http://schemas.android.com/tools">

    <application
        android:name=".CustomApplication"
        android:allowBackup="true"
        android:dataExtractionRules="@xml/data_extraction_rules"
        android:fullBackupContent="@xml/backup_rules"
        android:icon="@mipmap/ic_launcher"
        android:label="@string/app_name"
        android:roundIcon="@mipmap/ic_launcher_round"
        android:supportsRtl="true"
        android:theme="@style/Theme.SimpleRealm"
        tools:targetApi="31">
        <activity
            android:name=".EditActivity"
            android:exported="false">
            <meta-data
                android:name="android.app.lib_name"
                android:value="" />
        </activity>
        <activity
            android:name=".MainActivity"
            android:exported="true">
            <intent-filter>
                <action android:name="android.intent.action.MAIN" />

                <category android:name="android.intent.category.LAUNCHER" />
            </intent-filter>

            <meta-data
                android:name="android.app.lib_name"
                android:value="" />
        </activity>
    </application>

</manifest>
▼activity_edit.xml
<?xml version="1.0" encoding="utf-8"?>
<androidx.constraintlayout.widget.ConstraintLayout xmlns:android="http://schemas.android.com/apk/res/android"
    xmlns:app="http://schemas.android.com/apk/res-auto"
    xmlns:tools="http://schemas.android.com/tools"
    android:layout_width="match_parent"
    android:layout_height="match_parent"
    tools:context=".EditActivity">

    <EditText
        android:id="@+id/etName"
        android:layout_width="wrap_content"
        android:layout_height="wrap_content"
        android:layout_marginTop="16dp"
        android:ems="10"
        android:hint="Name"
        android:inputType="textPersonName"
        android:textSize="20sp"
        app:layout_constraintEnd_toEndOf="parent"
        app:layout_constraintStart_toStartOf="parent"
        app:layout_constraintTop_toTopOf="parent" />

    <Button
        android:id="@+id/btnSave"
        android:layout_width="wrap_content"
        android:layout_height="wrap_content"
        android:layout_marginTop="16dp"
        android:text="save"
        app:layout_constraintEnd_toEndOf="parent"
        app:layout_constraintStart_toStartOf="parent"
        app:layout_constraintTop_toBottomOf="@+id/etName" />
</androidx.constraintlayout.widget.ConstraintLayout>
▼EditActivity.kt
package com.example.simplerealm

import androidx.appcompat.app.AppCompatActivity
import android.os.Bundle
import android.widget.Button
import android.widget.EditText
import android.widget.Toast
import io.realm.Realm
import io.realm.kotlin.createObject
import io.realm.kotlin.where

class EditActivity : AppCompatActivity() {
    //8)Realmの変数宣言
    private lateinit var realm :Realm

    override fun onCreate(savedInstanceState: Bundle?) {
        super.onCreate(savedInstanceState)
        setContentView(R.layout.activity_edit)
        //4)Viewの取得
        val etName :EditText = findViewById(R.id.etName)
        val btnSave:Button =findViewById(R.id.btnSave)

        //8)ここでもRealmインスタンスを生成
        realm = Realm.getDefaultInstance()

        //9)Saveボタンを押したら~
        btnSave.setOnClickListener {
            //上書き用の変数を用意
            var name :String =""
            //10)入力された文字が空文字でなければ~(変数に代入)
            if(!etName.text.isNullOrEmpty()){
                name = etName.text.toString()
            }
            //11)【DBに書き込みますよ】 / Transaction{}
            realm.executeTransaction {
                val currentId = realm.where<MyModel>().max("id")//現時点のid(の最高値)を取得
                val nextId =(currentId?.toLong()?:0L)+1L//最高値に1を追加(最高値が0なら1に)←行を追加するイメージ

                //モデルクラス(nextId番目)に値をセット
                val myModel =realm.createObject<MyModel>(nextId)
                myModel.name = name
            }
            //12)toastでメッセージを表示
            Toast.makeText(applicationContext,"保存しました",Toast.LENGTH_SHORT).show()
            finish()
        }
    }

    //8)Realm閉じる
    override fun onDestroy() {
        super.onDestroy()
        realm.close()
    }
}
▼MyModel.kt
package com.example.simplerealm

import io.realm.RealmObject
import io.realm.annotations.PrimaryKey

open class MyModel:RealmObject() {
    @PrimaryKey
    var id :Long =0
    var name :String =""
}
参考サイト
Android Tutorial on realm database | local database | android coding
スマホアプリ開発つまずきポイント:Realmデータベースの使い方~金宏和實「作ればわかる!Androidプログラミング」