前回、前々回でカウントダウンタイマーを作ってみました。
スタートボタンを押すと、カウントダウンされ、
ストップで停止。
で、リスタートボタンで続きから開始されるというものでした。
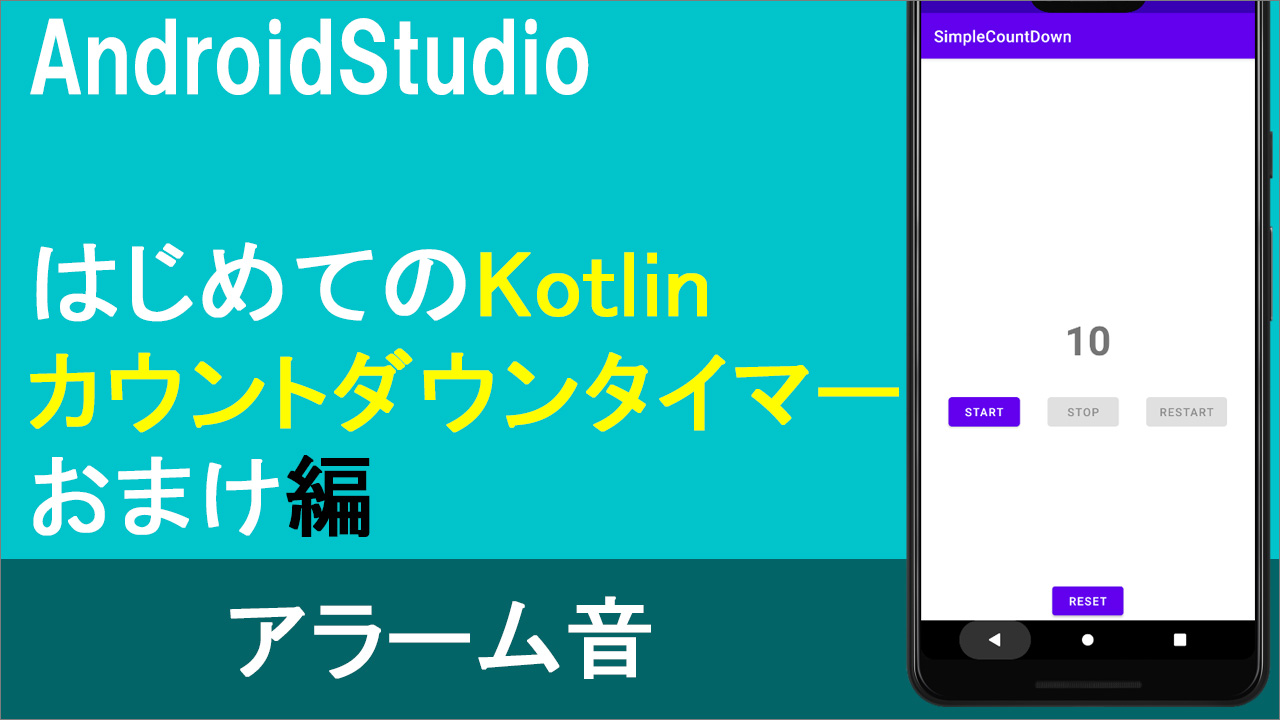
今回はその続きで、ちょっとだけオマケで、このようにカウントが0になって終了したら、アラームを鳴らしてみたいと思います。アラーム音は、第23回のところで使ったMediaPlayerの復習になります。
使用音楽素材:効果音ラボさんのフリー素材「目覚まし時計のアラーム」
動画
コード
▼activity_main.xml
<?xml version="1.0" encoding="utf-8"?>
<androidx.constraintlayout.widget.ConstraintLayout xmlns:android="http://schemas.android.com/apk/res/android"
    xmlns:app="http://schemas.android.com/apk/res-auto"
    xmlns:tools="http://schemas.android.com/tools"
    android:layout_width="match_parent"
    android:layout_height="match_parent"
    tools:context=".MainActivity">


    <TextView
        android:id="@+id/tv"
        android:layout_width="wrap_content"
        android:layout_height="wrap_content"
        android:text="00:00"
        android:textSize="50sp"
        android:textStyle="bold"
        app:layout_constraintBottom_toBottomOf="parent"
        app:layout_constraintEnd_toEndOf="parent"
        app:layout_constraintStart_toStartOf="parent"
        app:layout_constraintTop_toTopOf="parent" />

    <Button
        android:id="@+id/btnStart"
        android:layout_width="wrap_content"
        android:layout_height="wrap_content"
        android:layout_marginTop="32dp"
        android:text="START"
        app:layout_constraintEnd_toStartOf="@+id/btnStop"
        app:layout_constraintHorizontal_bias="0.5"
        app:layout_constraintStart_toStartOf="parent"
        app:layout_constraintTop_toBottomOf="@+id/tv" />

    <Button
        android:id="@+id/btnStop"
        android:layout_width="wrap_content"
        android:layout_height="wrap_content"
        android:layout_marginTop="32dp"
        android:text="STOP"
        app:layout_constraintEnd_toStartOf="@+id/btnRestart"
        app:layout_constraintHorizontal_bias="0.5"
        app:layout_constraintStart_toEndOf="@+id/btnStart"
        app:layout_constraintTop_toBottomOf="@+id/tv" />

    <Button
        android:id="@+id/btnRestart"
        android:layout_width="wrap_content"
        android:layout_height="wrap_content"
        android:layout_marginTop="32dp"
        android:text="RESTART"
        app:layout_constraintEnd_toEndOf="parent"
        app:layout_constraintHorizontal_bias="0.5"
        app:layout_constraintStart_toEndOf="@+id/btnStop"
        app:layout_constraintTop_toBottomOf="@+id/tv" />

    <Button
        android:id="@+id/btnReset"
        android:layout_width="wrap_content"
        android:layout_height="wrap_content"
        android:text="RESET"
        app:layout_constraintBottom_toBottomOf="parent"
        app:layout_constraintEnd_toEndOf="parent"
        app:layout_constraintStart_toStartOf="parent" />
</androidx.constraintlayout.widget.ConstraintLayout>
▼MainActivity.kt
package com.example.simplecountdown
import android.media.MediaPlayer
import androidx.appcompat.app.AppCompatActivity
import android.os.Bundle
import android.os.CountDownTimer
import android.widget.Button
import android.widget.TextView
class MainActivity : AppCompatActivity() {
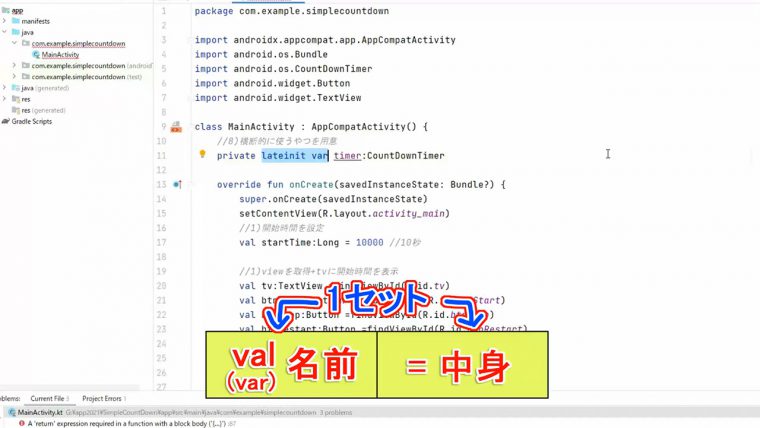
//8)横断的に使うやつを用意
private lateinit var timer:CountDownTimer
private var remainingTime:Long = 0 //9)残り時間(後で代入するので一旦0)
private lateinit var mp:MediaPlayer //12)
override fun onCreate(savedInstanceState: Bundle?) {
super.onCreate(savedInstanceState)
setContentView(R.layout.activity_main)
//1)開始時間を設定
val startTime:Long = 10000 //10秒
//1)viewを取得+tvに開始時間を表示
val tv:TextView =findViewById(R.id.tv)
val btnStart:Button =findViewById(R.id.btnStart)
val btnStop:Button =findViewById(R.id.btnStop)
val btnRestart:Button =findViewById(R.id.btnRestart)
val btnReset:Button =findViewById(R.id.btnReset)
tv.text ="${startTime/1000}" //開始時間を秒で表示
//2)ボタンの有効・無効
btnStart.isEnabled = true
btnStop.isEnabled = false
btnRestart.isEnabled = false
//4)カウントダウンタイマーのオブジェクトを用意
//val timer =
//3)スタートボタンを押したらカウントダウン
btnStart.setOnClickListener {
//5)「4」のtimerをスタート
//timer.start()
//10)startTimeでカウントダウン開始
timer = countDownTimer(startTime).start()
btnStart.isEnabled = false
btnStop.isEnabled = true
btnRestart.isEnabled = false
}
//6)ストップボタンを押した時の処理
btnStop.setOnClickListener {
timer.cancel()
//ストップボタンを無効化
btnStart.isEnabled = true
btnStop.isEnabled = false
btnRestart.isEnabled = true
}
//7)リスタートボタンを押した時の処理
btnRestart.setOnClickListener {
//10)remainingTimeでカウントダウン開始
timer = countDownTimer(remainingTime).start()
btnStart.isEnabled = false
btnStop.isEnabled = true
btnRestart.isEnabled = false
}
//11)リセットボタン
btnReset.setOnClickListener {
timer.cancel()
remainingTime = 0
tv.text ="${startTime/1000}" //開始時間を秒で表示
//2)ボタンの有効・無効
btnStart.isEnabled = true
btnStop.isEnabled = false
btnRestart.isEnabled = false
//14)mp停止
mp.stop()
mp.release()
}
}
//8)「4」を関数でここに用意
private fun countDownTimer(st:Long):CountDownTimer{
val tv:TextView =findViewById(R.id.tv)
val btnStart:Button =findViewById(R.id.btnStart)
val btnStop:Button =findViewById(R.id.btnStop)
val btnRestart:Button =findViewById(R.id.btnRestart)
return object :CountDownTimer(st,100){
//[4-1]途中経過・残り時間
override fun onTick(p0: Long) {
//TODO("Not yet implemented")
//残り時間を表示
tv.text ="${p0/1000}" //秒単位
remainingTime = p0 //9)残り時間を代入
}
//[4-2]終了設定
override fun onFinish() {
//TODO("Not yet implemented")
tv.text ="タイムアップ"
//終了時は3つ全部無効
btnStart.isEnabled = false
btnStop.isEnabled = false
btnRestart.isEnabled = false
//13)MediaPlayerを再生
mp = MediaPlayer.create(this@MainActivity,R.raw.alarm)
mp.isLooping =true
mp.start()
}
}
}
}
テキスト
それでは音楽ファイルが用意できたらはじめて行きましょう。
一応、復習がてらMediaPlayerの使い方について改めて解説しておくと
①まずres、リソースの中にrawフォルダを作って、その中に音楽ファイルを入れる
②MediaPlayerをインポート
③最後に鳴らしたいところに開始の記述を書く
という流れになります。
12)rawとMediaPlayer
それではまずrawフォルダを用意して、その中に音楽ファイルを入れていきましょう。
てことで、左側のres、リソースを開いてください。
rawフォルダは、最初の段階では用意されていないので
使いたい人が、使いたい時に作ってあげます。
resを右クリック⇒new⇒で、フォルダなんですけどプログラミングではちょっとカッコつけて
ディレクトリといいます
raw と入力してエンター。
これでrawフォルダが出来ましたので、みなさんご用意の音楽ファイルを
入れてください。
ここではファイル名をalarmとしています。
このままドラッグ&ドロップでもいいですし
ctrlを押しながらするとコピーになります。
はいこれでrawフォルダに音楽ファイルが入りました。
ではMediaPlayerをインポートしましょう。
場所はonCreateの上、厳密には クラスの下。
ここにprivate valで宣言してとりあえず名前をつけてあげます。
MediaPlayer略してmp
これに続けてMediaって入れるとMediaPlayerってのがあるので選択。
そうするとMediaPlayerがインポートされて、この人 mp は
MediaPlayerのクラスが使えるようになりました。
ただし、今は名前を付けただけで、本当はこっちにイコールで中身を入れてあげなければいけません。
今はここでは名前だけつけて、中身はonCreateの中で書いていくので、宣言する場所と、中身の場所が違うと。
てことで、中身は後でね、って言う場合は
前回説明のとおり
初期化を遅らせるということでlateinitを使うんでしたね。
private につづけて
lateinitの場合は、valではなくってvar。
これで下準備は完了です。
次にmpを必要なところに書いていきましょう。
private lateinit var mp :MediaPlayer //12)
13)mpと、start()
それでは、今名前を付けたmpを使って、メディアプレイヤーを再生していきましょう。
音楽を鳴らすタイミングは、もちろんタイマーが終わった時なので、
CountDownTimerの、onFinishの方ですね。
この波カッコの中に書いていきましょう。
mp= MediaPlayer.create~
ここではじめて中身が入ります。

で、前回はここに自分自身ということでthis、とかいて
続けてファイルの場所であるR.raw.alarm と書かいてくださいって説明したと思うんですが。
今回なんかエラーが出ています。
None of the following functions can be called with the arguments supplied
これ、javaをやってた方はピンと来るかもしれないんですけど、
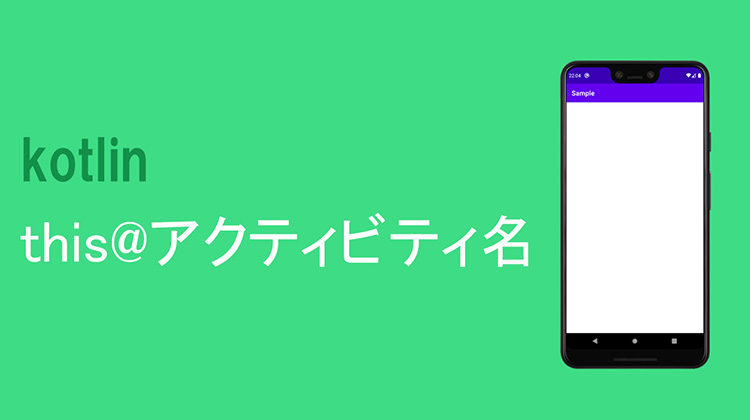
あー、ここは、MainActivity.thisね、と。それで正解ちゃ正解なんですけど、kotlinは書き方だけちょっと違います。
正解を言っておくと
this@MainActivity
と記述します。まず、一から、ちょっと理屈っぽく説明しますね。
そもそもこのthisっていうのは自分自身という意味なんですけど
厳密には「自身のクラス」という意味です。
てことで、今回の場合のthisは、このカウントダウンタイマーのクラスをさすので
画面全体を指定する場合には@(アットマーク)に続けてMainActivityを書いてあげる必要がります。
てことで、ひとまず理屈っぽく説明すると以上になります。
が、ぶっちゃけ、よーわからんなって人はですね
thisって書くところは、「thisか、this@アクティビティ名」、
この2択でなんとかなります。
てことで、これで無事、mpの中に色々入りましたのでもう少し書いていきましょう。
まず1つ目は1曲目が終わったらループをさせたいので
mp.isLooping = true
あとはスタートさせてあげればいいので
mp.start()
これで音楽は流れるようになりました。
ただし今は音楽が流れっぱなしなので、
リセットボタンを押したら音楽を止めてあげましょう。
14)MediaPlayerを停止
アラーム音を停止するのは
リセットボタンが押された時なので
btnResetの波カッコの中に書いていきます。
            //14)mp停止
            mp.stop()
            mp.release()
まずは音楽を止めて
mp.stop()
メモリを解放します
mp.release()
さあ、これで完成です。
エミュレータを起動して、アラーム音がなるか、確認してみましょう。