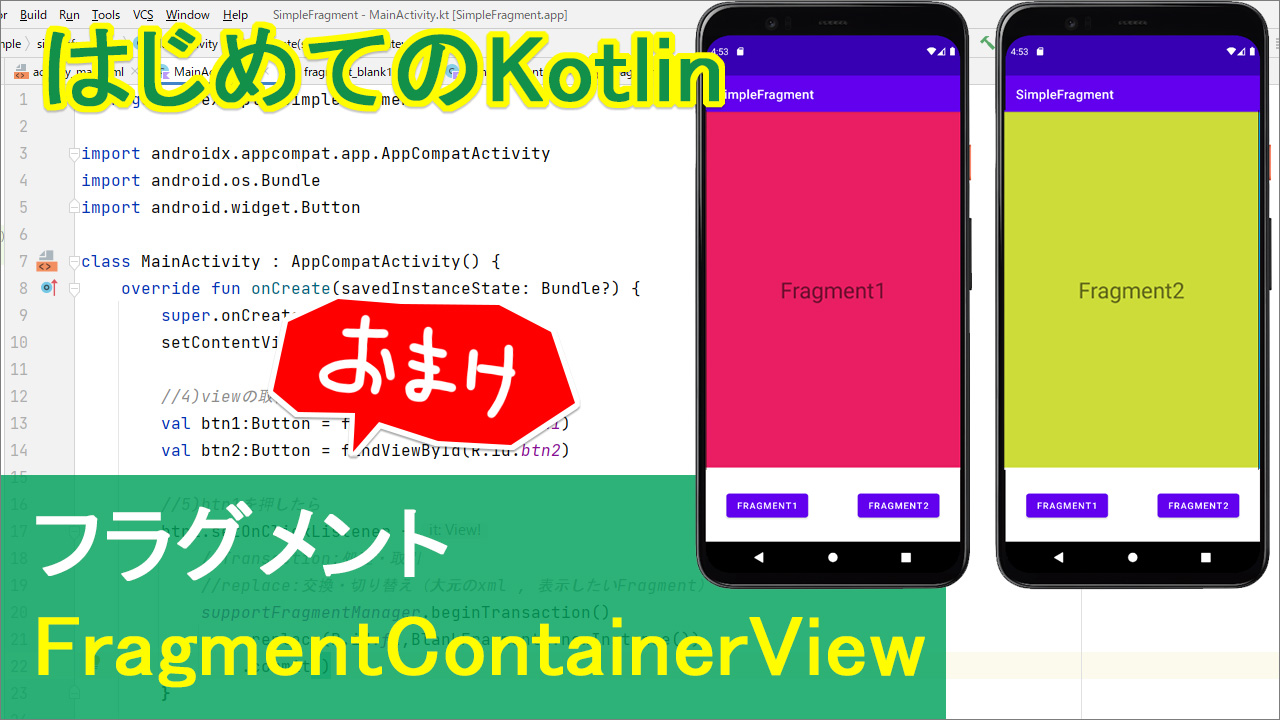
前回、Fragmentについて解説しました。今回はそのおまけというか、補足動画です。
前回は、Fragmentを表示するスペースを「FrameLayout」っていうレイアウトで指定したわけですが。Fragmentを乗っけるにはViewとしてもアイテムが用意されていてFragmentContainerViewっていうのがあります。こっちでもいけるので、このFragmentContainerView、てのを使って、前回と全く同じアプリを作ってみたいと思います。
動画
目次(再生時間)
| タイトル | 再生時間 |
| [01]Main xml | 01:35~ |
| [02]Fragment1 | 06:23~ |
| [03]Fragment2 | 10:05~ |
| [04]Viewを取得 | 13:10~ |
| [05]btn1を押したらFragment1 | 14:25~ |
| [06]btn2を押したらFragment2 | 18:20~ |
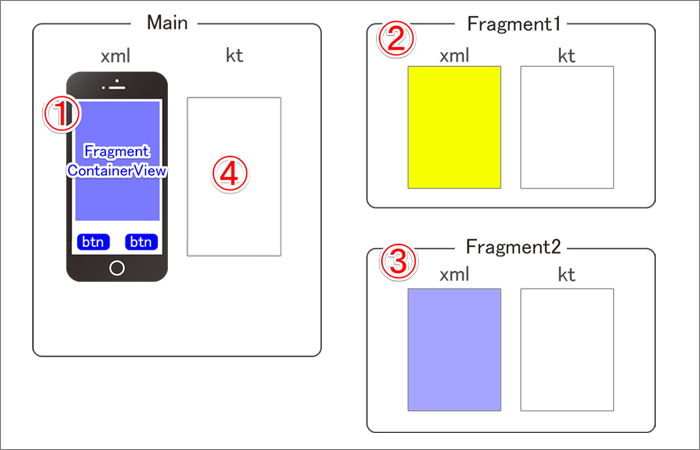
主な手順の流れ↓

コード
▼activity_main.xml
<?xml version="1.0" encoding="utf-8"?>
<androidx.constraintlayout.widget.ConstraintLayout xmlns:android="http://schemas.android.com/apk/res/android"
    xmlns:app="http://schemas.android.com/apk/res-auto"
    xmlns:tools="http://schemas.android.com/tools"
    android:layout_width="match_parent"
    android:layout_height="match_parent"
    tools:context=".MainActivity">

    <androidx.fragment.app.FragmentContainerView
        android:id="@+id/fcv"
        android:layout_width="match_parent"
        android:layout_height="550dp"
        app:layout_constraintTop_toTopOf="parent" />

    <Button
        android:id="@+id/btn1"
        android:layout_width="wrap_content"
        android:layout_height="wrap_content"
        android:layout_marginStart="32dp"
        android:layout_marginBottom="32dp"
        android:text="Fragment1"
        app:layout_constraintBottom_toBottomOf="parent"
        app:layout_constraintStart_toStartOf="parent" />

    <Button
        android:id="@+id/btn2"
        android:layout_width="wrap_content"
        android:layout_height="wrap_content"
        android:layout_marginEnd="32dp"
        android:layout_marginBottom="32dp"
        android:text="Fragment2"
        app:layout_constraintBottom_toBottomOf="parent"
        app:layout_constraintEnd_toEndOf="parent" />


</androidx.constraintlayout.widget.ConstraintLayout>
▼MainActivity.kt
package com.example.simplefragmentcontainerview

import androidx.appcompat.app.AppCompatActivity
import android.os.Bundle
import android.widget.Button

class MainActivity : AppCompatActivity() {
    override fun onCreate(savedInstanceState: Bundle?) {
        super.onCreate(savedInstanceState)
        setContentView(R.layout.activity_main)

        //4)viewの取得
        val btn1:Button = findViewById(R.id.btn1)
        val btn2:Button = findViewById(R.id.btn2)

        //5)btn1を押したら
        btn1.setOnClickListener {
            supportFragmentManager.beginTransaction()
                .replace(R.id.fcv,BlankFragment1())
                .commit()
        }

        //6)btn2を押したら
        btn2.setOnClickListener {
            supportFragmentManager.beginTransaction()
                .replace(R.id.fcv,BlankFragment2())
                .commit()
        }

    }
}
▼fragment_blank1.xml
<?xml version="1.0" encoding="utf-8"?>
<androidx.constraintlayout.widget.ConstraintLayout xmlns:android="http://schemas.android.com/apk/res/android"
    xmlns:app="http://schemas.android.com/apk/res-auto"
    xmlns:tools="http://schemas.android.com/tools"
    android:layout_width="match_parent"
    android:layout_height="match_parent"
    android:background="#E91E63"
    tools:context=".BlankFragment1">


    <TextView
        android:id="@+id/textView"
        android:layout_width="wrap_content"
        android:layout_height="wrap_content"
        android:text="Fragment1"
        android:textSize="34sp"
        app:layout_constraintBottom_toBottomOf="parent"
        app:layout_constraintEnd_toEndOf="parent"
        app:layout_constraintStart_toStartOf="parent"
        app:layout_constraintTop_toTopOf="parent" />
</androidx.constraintlayout.widget.ConstraintLayout>
▼BlankFragment1.kt
package com.example.simplefragmentcontainerview

import android.os.Bundle
import androidx.fragment.app.Fragment
import android.view.LayoutInflater
import android.view.View
import android.view.ViewGroup

// TODO: Rename parameter arguments, choose names that match
// the fragment initialization parameters, e.g. ARG_ITEM_NUMBER
private const val ARG_PARAM1 = "param1"
private const val ARG_PARAM2 = "param2"

/**
 * A simple [Fragment] subclass.
 * Use the [BlankFragment1.newInstance] factory method to
 * create an instance of this fragment.
 */
class BlankFragment1 : Fragment() {
    // TODO: Rename and change types of parameters
    private var param1: String? = null
    private var param2: String? = null

    override fun onCreate(savedInstanceState: Bundle?) {
        super.onCreate(savedInstanceState)
        arguments?.let {
            param1 = it.getString(ARG_PARAM1)
            param2 = it.getString(ARG_PARAM2)
        }
    }

    override fun onCreateView(
        inflater: LayoutInflater, container: ViewGroup?,
        savedInstanceState: Bundle?
    ): View? {
        // Inflate the layout for this fragment
        return inflater.inflate(R.layout.fragment_blank1, container, false)
    }

    companion object {
        /**
         * Use this factory method to create a new instance of
         * this fragment using the provided parameters.
         *
         * @param param1 Parameter 1.
         * @param param2 Parameter 2.
         * @return A new instance of fragment BlankFragment1.
         */
        // TODO: Rename and change types and number of parameters
        @JvmStatic
        fun newInstance(param1: String, param2: String) =
            BlankFragment1().apply {
                arguments = Bundle().apply {
                    putString(ARG_PARAM1, param1)
                    putString(ARG_PARAM2, param2)
                }
            }
    }
}
▼fragment_blank2.xml
<?xml version="1.0" encoding="utf-8"?>
<androidx.constraintlayout.widget.ConstraintLayout xmlns:android="http://schemas.android.com/apk/res/android"
    xmlns:app="http://schemas.android.com/apk/res-auto"
    xmlns:tools="http://schemas.android.com/tools"
    android:layout_width="match_parent"
    android:layout_height="match_parent"
    android:background="#CDDC39"
    tools:context=".BlankFragment2">


    <TextView
        android:id="@+id/textView2"
        android:layout_width="wrap_content"
        android:layout_height="wrap_content"
        android:text="Fragment2"
        android:textSize="34sp"
        app:layout_constraintBottom_toBottomOf="parent"
        app:layout_constraintEnd_toEndOf="parent"
        app:layout_constraintStart_toStartOf="parent"
        app:layout_constraintTop_toTopOf="parent" />
</androidx.constraintlayout.widget.ConstraintLayout>
▼BlankFragment2.kt
package com.example.simplefragmentcontainerview

import android.os.Bundle
import androidx.fragment.app.Fragment
import android.view.LayoutInflater
import android.view.View
import android.view.ViewGroup

// TODO: Rename parameter arguments, choose names that match
// the fragment initialization parameters, e.g. ARG_ITEM_NUMBER
private const val ARG_PARAM1 = "param1"
private const val ARG_PARAM2 = "param2"

/**
 * A simple [Fragment] subclass.
 * Use the [BlankFragment2.newInstance] factory method to
 * create an instance of this fragment.
 */
class BlankFragment2 : Fragment() {
    // TODO: Rename and change types of parameters
    private var param1: String? = null
    private var param2: String? = null

    override fun onCreate(savedInstanceState: Bundle?) {
        super.onCreate(savedInstanceState)
        arguments?.let {
            param1 = it.getString(ARG_PARAM1)
            param2 = it.getString(ARG_PARAM2)
        }
    }

    override fun onCreateView(
        inflater: LayoutInflater, container: ViewGroup?,
        savedInstanceState: Bundle?
    ): View? {
        // Inflate the layout for this fragment
        return inflater.inflate(R.layout.fragment_blank2, container, false)
    }

    companion object {
        /**
         * Use this factory method to create a new instance of
         * this fragment using the provided parameters.
         *
         * @param param1 Parameter 1.
         * @param param2 Parameter 2.
         * @return A new instance of fragment BlankFragment2.
         */
        // TODO: Rename and change types and number of parameters
        @JvmStatic
        fun newInstance(param1: String, param2: String) =
            BlankFragment2().apply {
                arguments = Bundle().apply {
                    putString(ARG_PARAM1, param1)
                    putString(ARG_PARAM2, param2)
                }
            }
    }
}
テキスト
①まずメインのレイアウト、Main xmlの方を作って、
②次に1つ目の画面用のフラグメント1っていうのを作って
③で、もう1つの画面、フラグメント2っていうのを作って
④最後にmain ktで、ボタンを押した時にそれらが呼び出されて表示される、という風にしていきます。
[01]Main xml
上記コード「activity_main.xml」ご参照
[02]Fragment1
上記コード
「fragment_blank1.xml」
「BlankFragment1.kt」ご参照
[03]Fragment2
上記コード
「fragment_blank2.xml」
「BlankFragment2.kt」ご参照
[04-05-06]
上記コード
MainActivity.ktの「4)」「5)」「6)」を記述。
ここのポイントは、「ボタンを押したら~」の「setOnClickListener」の中が、このような定型文になるということです。

replace()内の1つ目の引数は、大元のxmlのid
第2引数は、フラグメントで表示するクラス。
ちなみに前回は、replaceの中を↓このように書きましたが・・・
.replace(R.id.fl,BlankFragment1.newInstance())
今回は赤いワーニングが出ていて「引数を2つ入れなさい(String,String)」みたいなのが出ています。
【原因】
原因は単純で、例えばBlankFragment1のクラスの、newInstance()を見てみましょう。
fun newInstance(param1: String, param2: String) =
となって、引数が指定されています。なので、呼び出しコードを書いた時にもnewInstance()の中には、引数を2つ書きなさいよと、指定されているわけです。(前回の動画では、引数をバッサリ削ったので問題なかった)
【解決法】
対処法は至って簡単で、クラスの中の特定の何かを指定しない場合は
BlankFragment1()
これでイケます。実は前回の動画でも、このやり方で出来ます。興味のある方は、前回のプロジェクトで書き換えてみてください。


